Showing posts with label tutorial. Show all posts

Thursday, January 27, 2011

Twine Holder Tutorial

I jumped on the trendy and simply decorated cotton baker's twine bandwagon, and finally bought my own spool. I've started to include it in my packaging and really like the nice, little touch it adds. Since I use it so often, I keep it handy, but on its own, it gets knocked over, the twine come unraveled, and it isn't fitting in with the organized flow of everything else in my workspace. Etsy's blog recently ran an article on antique string dispensers and my first problem-solving thoughts jumped to buying some fun, vintage artifact that was made to do just what I needed it to do. I browsed and was quickly discouraged by the selections, the prices, and the fact that many of them were either best mounted on a wall or required the spool to be unwound first.
I stared intently at the spool and suddenly, creative inspiration high-fived thriftiness, and I had my solution. I grabbed the materials and headed to the work bench. No more than three minutes later, I had my twine holder. Sweet!

Obviously it's not very complicated, and I wouldn't have thought to post a tutorial, but I couldn't find anything like that in my quick Google search, and I thought of a neat little tip on the fly that I think is worth sharing. So here is how you can make one for yourself, you twine-loving crafty person you!


Start with these few simple elements: Your spool of twine (mine is a 240 yd spool of the popular Divine Twine), a jelly jar that the spool fits into (I found this tall, quilted jar fit perfectly, but many medium-sized jars would work too), a hammer and I relatively large gauge/ thick nail.


I imagine this would work with a single piece lid, but it worked very well with a 2-piece. Set the nail into the center of the inside of the flat part of the lid (on the workbench or some other surface that can handle a nail driven into it -- NOT on your dining room table!).

Once the nail fit through the opening, I took it out and flipped the lid over. Here's where the genius really kicked in. I put the nail back through the hole in the lid so that that head of the nail rested on the sharp edges of the hole opening. Then I positioned the lid on the workbench so that the nail hung over the edge. A quick rap or two with the hammer on the head of the nail, and I flattened those sharp edges.


So now, I had a smooth, snag-less opening on the inside of the lid:


And a relatively ouch-less opening on the outside of the lid. I patted myself on the back for that one.


Then, I just put the spool in the jar, threaded the twine through the opening and the lid ring, screwed on the lid and Presto! Twine Holder. It fits the spool like they were made together, it's weighty enough to stay in place when I pull on the twine from the top, it's pretty darn cute, it didn't cost me a cent, and it's crafty as all get out.


I suppose an uber-crafter could go to town decorating the jar and/or the jar's lid with all sorts of craftiness, but I'm happy with this simple, re-purposed gem, and my hubby is glad that I didn't buy anything else. :)


Monday, November 16, 2009

Making Lemonade, or in this case, Coupons

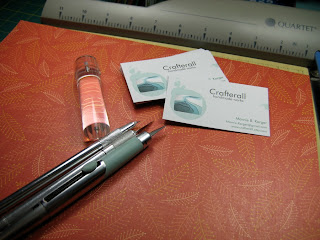
A while back, I ordered a batch of business cards. To my dismay, they arrived with all sorts of errors making them essentially unusable. But the cardstock was a very nice thickness and I felt like there must be something I could do with them. Ta-da! Coupons!

By covering up all the misprints and making them look more interesting, I transformed them into snazzy little coupon cards to include in orders from my shop. Here's how I make them:

I start by punching a one-inch hole on one side of the card. This isn't necessary to making them coupons, but it's an easy way to make them stand out.


And to show my true pack-rat/craftiness, I've been saving those little punched circles and piecing together a garland by gluing two together over a length of string. I couldn't possibly throw away perfectly good little circles! ;)

Next, I cut pieces of cardstock to fit just inside the length and width of the business card. This cardstock comes from the edges of the bigger sheets I use to make my cards and art -- yet another thing I save for just such a occasion. Using my handy-dandy adhesive dispenser, I get the punched card good and sticky.


Then, I center the cardstock over the business cards, and most of the letters and images are covered up!


Then, again because I like to be crafty, I punch the colored hole I've created once with a regular-sized hole punch, and twice with a small punch, so it looks basically like this:


Sort of lunar, don't you think?

Then I print out my text onto return address labels. One sheet gives me thirty stickers. When I created the labels on the computer, I rotated the text on one end to allow me to fold the label over the top edge of the coupon, like so:


A few minutes later, I have thirty cute, unique, and hopefully useful little coupons, and I've turned the lemons of my bum business cards into lemonade... or coupons... with a lemony zing, if you will. ;)


What do you think? Do any of you include coupons? How about other tricks for using misprinted or outdated business cards?

Thanks for taking a look. Happy crafting!

Wednesday, October 7, 2009

Business Card Holder - a simple, little tutorial

As a seller, I know that it's important to place a few business cards with every order from my shop. As a buyer, I love getting fun packages and neat little extras. Marrying these two ideas, I've come up with a simple business card holder that doubles as a sort of goodie bag for my lucky and lovely patrons. And here, for your crafting delight, is a tutorial to make your very own business card holders.


Tools and Materials:

- Cardstock or thin paperboard (I'm using a 12 x 12" scrapbook-type cardstock. Try cereal box paperboard or an oversized postcard)
- Ruler
- Paper Cutter(s) (I'm using my big paper slicer for the straight cuts and a small swivel blade for cutting the notch)
- Scoring tool (I use a scoring blade on a paper trimmer. A bone folder can work as well)
- Some sort of adhesive to hold the holder closed (I use a sticker. Try ribbon, decorative tape, glue dots, double-sided tape, etc.)


Instructions:

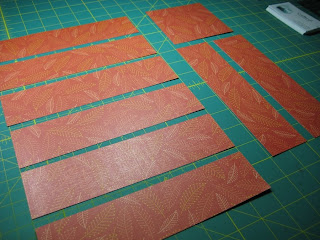
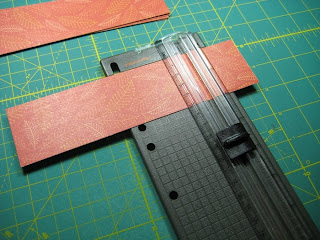
Step 1: Cut the cardsctock into 2" x 8" strips. A 12 x 12" piece yields 8 strips and a 4" square.


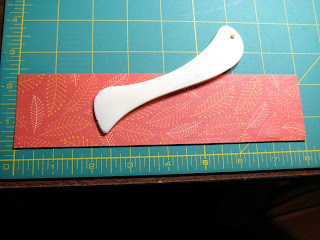
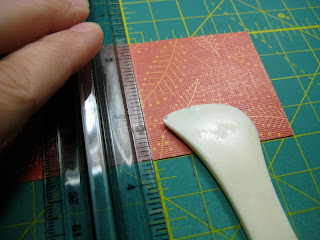
Step 2: Mark scoring points at 2.25" and 6" along a single strip.


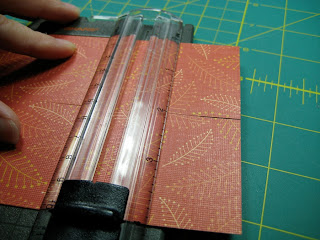
Step 3: Score the cardstock on these two points across the strip.


Again, a bone folder and a ruler work fine here too. If you lack a bone folder, a lead-less mechanical pencil can do in a pinch.


Score any remaining strips you cut along the same points. I usually use the first strip as a guide to cutting the rest by leaving it in the trimmer and laying the next strip beneath it.


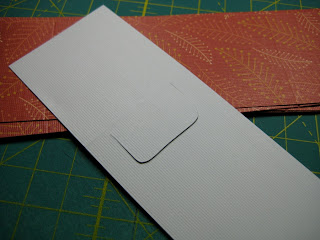
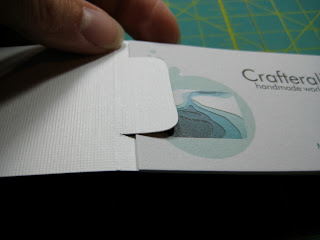
Step 4: Cut the notch. This notch is what holds the business cards more or less in place. Star just below the 2" score line, pull down about half and inch, go over about an inch, and then finish lust below the score line again to look like this:


Then, fit in your cards by slipping 3 or 4 of them under this notch.


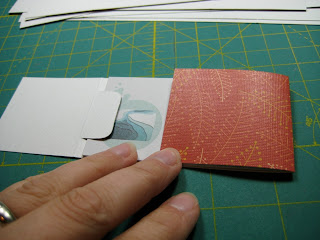
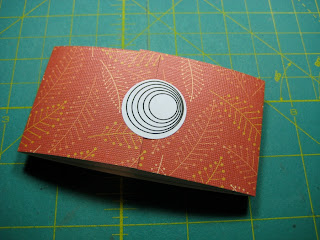
Step 5: Fold sides to close and seal.


Ta-da!


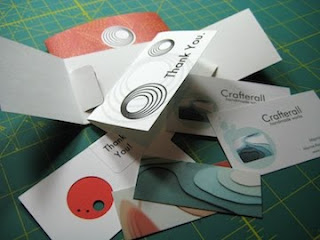
I really put mine to task, filling each one with a folded thank you note, two regular sized business cards, two mini Moo cards, and a coupon made from an old business card (I'll show you how I make those another time).


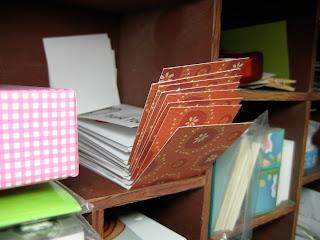
I like to keep a stack of these handy so that when I get an order, all I have to do is write a personal note in the thank-you card, put it all back together, seal it up, and nestle it in the package.


You could certainly dress these up more to your taste, adding ribbon, making them bigger, rounding the corners, etc. Me? I like 'em simple. Do let me know if you try these out. Happy crafting!
 

blogger templates | Make Money Online