Showing posts with label business. Show all posts

Friday, August 26, 2011

Topographic Table


My studio is... well... it's practical. It's not lovely, airy, sun-soaked, or spartan like all good studios are supposed to be, but it gets the job done. My studio is the messy pony tail of the workspace universe -- It ain't pretty, but it helps me get my work done.

I work in the basement of our home. Sure, I have to supplement the lighting with lamps. And sure, I have workout equipment, an old t.v., dusty VHS tapes, and a stray sock from the laundry chute as my twisted feng-shui backdrop. Who cares? 75% of the year it's the perfect temp -- if on the cool side, I can crank the stereo without waking the kids, I can write off the "overhead" as a business expense, and most importantly, it's big enough that I can fit all my stuff here and I don't have to share with anyone.

So, it was a little fun when I actually made some changes to it recently. I occasionally take EVERYTHING off the 8-foot table and give the surface a good scrub. After staring at the wet marks evaporate from the faux-woodgrain tabletop, I was inspired to paint it white. I found some old white paint the former owners had left and laid on two, gooey coats of it in one day. From its age, my misuse, or something, the paint did not spread very nicely. Some parts were wonderfully white, while other parts hinted at a darker layer beneath. I'm an impatient re-decorator, so instead of applying yet another layer of paint on, I uncapped my Sharpie and went to town. Drawing (literally) from all my experience with contour maps over the last 4 years, I topo-fied my tabletop.


It still isn't spectacular, but it's brighter, more creative, much less faux-woodgrain, and totally Crafterall. After editing the "stuff" I need on the table and replacing the bare essentials, I can honestly say that it was worth it. Something about it says, "Yup. This is for real, y' know. This is your job. Now go, kick some butt."


I am o.k. (for now) with the fact that my studio will never look like Martha's or any of the dreamy spaces I've seen featured online. I do want to work a little more, though, on paring down even further, finding more out-of-the-way places for my less-frequently used tools and materials, and getting the whole place to jive a little more. If I'm going to spend 60 hours a week down here, I better darn well enjoy it! Maybe I'll get around to a complete "before and after" post when that "after" feels complete... say, in a couple years or so. *wink*

Friday, August 20, 2010

Packaging Tidbits

My post on basic packaging tips is up on the Handmade Minnesota team blog. I invite you to scoot over there, have a read, and please share a bit of your packaging and shipping acumen. Thanks!

Tuesday, August 17, 2010

Eight Hundred Cards

What does 800 cards from Crafterall look like?

Something like this:

Sorted, counted, ready to package:


Making the cards is the biggest part, but by no means the only part of filling such a large order. There's packaging the individual cards and/or sets with envelopes and inserts, completing and printing necessary packing and billing paperwork, packing the entire order to be shipped, and obtaining postage for the whole deal.


I really like this part. It's relatively mindless and it lets me do something I love: play with packaging!


This is starting to feel kinda "big time." I'm exhausted, proud, and thrilled all at once. Phew!

*edited to add: Did you know that there is a wiki page for the number "800"? At first, I thought it was a bit ridiculous as I read, "800 (eight hundred) is the natural number following 799 and preceding 801." Um... duh. We need a wiki for this? Then, I read this: "It is the sum of four consecutive primes (193 + 197 + 199 + 211), " and proceeded to geek out. This is actually pretty darn cool. See here for more on 800 or choose your own number.*

Monday, March 15, 2010

Topography Card Sets @ MoMA Store Online!


If you live outside New York and want your own set of the custom-colored, 4-card set of these topography cards, you're in luck! They are now available online at the MoMA Store site.

And to answer your question before you ask it, no, I haven't wrapped my brain around the fact that the listing for my cards exist in the same sales category as the Tim Burton, Andy Warhol, or Frank Lloyd Wright notecards. That's just a bit bigger than this noodle can handle. ;)

Friday, January 22, 2010

This Mama's at the MoMA!

I cannot contain my super top secret any longer!

To set the scene:

Imagine me, leaping around the house, pigtails flying, singing "tra-la-laaaaa" a la Captain Underpants, bumping into doorways, with small children and a giant dog excitedly chasing after me.

Got it?

That's how thrilled I am .

Crafterall has landed at the Museum of Modern Art retail store in New York!

Currently, they're selling these lovely "Layered Love" cards in time for the mushy stuff to come next month.


Coming in February, these custom colored topography card sets in Sea Foam, Royal, Poppy and Violet.


It's been rough keeping this news under wraps until I knew the cards were physically in the store. I had told a few people after I was first contacted by a MoMA rep, but I made them swear to secrecy and threatened them with dollar store greeting cards for the rest of all their birthdays if they leaked the news.

While I was prepared to undertake the size of the order, I did climb a pretty steep learning curve related to the paperwork and shipping procedures necessary to conduct business with a bigger retail outlet. For instance, I now know what a bill of lading is and have created my own version of one to use again, as well as my own custom packing slip and invoice. I feel so... official.

So, many of you are probably wondering how this all happened. I suppose I can say that great product photos, original designs, and a swing toward to the modern side of styles was all it took, but I think luck played a very nice hand in this instance.

Back in late August, I was contacted via Etsy by a Paper Products Manager for MoMA Retail who was browsing the stationary on the site and was drawn to my topography cards. Luck. She requested some samples, I sent her a few topography cards in a variety of colors as well as a couple of other cards I was making at the time.

Around that time, I was transitioning from a discontinued line of cardstock to a newer one with more color options (luck), so a few weeks later, I sent more samples and a color swatch sheet for reference. The rep conferred with her people and got back to my people (well, just me, really), with four color choices for a custom set, and also mentioned interest in buying the heart cards for Valentine's day. Luck. She was also able to give me a heads up on the item count before the actual purchase order giving me ample time to complete everything. She has been a dream to work with since our very first correspondence and continues to cheerfully lead me through the big business processes. Major Luck.

So that's that! I've googled "Etsy" and "MoMA" together a bunch of times and have not yet read anything from anybody else like me who's been hand plucked like this. Has this or something like it happened to anyone else out there? I feel very strange, honored, and I'll say it again, LUCKY to be where I am.

And I'm happy as can be.

Perhaps it's a bit of a stretch, but it sort of feels like I've won a big award. So, in that light, I'll close this post with my acceptance speech full of thanks and dedications:

Thank you so much! Seriously, thank YOU! Yes YOU, reading this blog post right now. Because I know you care enough to come to my blog and read through this, I grow more confident and continue to create pieces that may catch the eyes of highfalutin retail shop managers. Thanks, too, to my friends and family who offer good criticism and support of what I do. Specifically, I thank my dear friend Kendra Zvonik who has held my hand through this whole process, who pulls my feet back down to earth when I float away in uncertainty, and who lifts me up when I wallow in frustration. I dedicate these happy vibes to my patient and supportive hubby and to my two crafty girls who've quietly watched me cut paper in my studio when they would have rather been playing hide and seek or wild cat rescue.

It feels so great to let this kitty out of the bag. Let's hope it enjoys a wild adventure out there!

Wednesday, December 16, 2009

I Put the "Hole" in Wholesale

Pardon my papercutting pun; I couldn't resist.

Recently, I had the pleasure of accepting a wholesale re-order from the delightful folks at Shoppe Local. I'm excited by how quickly the request came after the initial order, and by the fact that the shop itself seems to be doing well. The downside, if there is any, is that it's a lot of work to turn out a big batch of topographic pieces and card sets, especially when I try to make my turn around time as short as possible. Still, I do enjoy my work and I love the business, so no complaining from me! This time around, I thought I'd snap a quick before and after shot of my work. Here is the stack of colored cardstock, white cardstock, white pre-scored cards, and my two well-traveled tools for cutting and sticking:


And here is the finished work, piled up once again on my studio table, this time as completed and packaged pieces ready to head to the shop:


I relish the satisfaction of completing a project like this. I'll admit that I do a little dance, raise my fists in the air, and make obnoxious crowd-cheer noises when I'm done. I figure I've earned it, right?

Monday, November 16, 2009

Making Lemonade, or in this case, Coupons

A while back, I ordered a batch of business cards. To my dismay, they arrived with all sorts of errors making them essentially unusable. But the cardstock was a very nice thickness and I felt like there must be something I could do with them. Ta-da! Coupons!

By covering up all the misprints and making them look more interesting, I transformed them into snazzy little coupon cards to include in orders from my shop. Here's how I make them:

I start by punching a one-inch hole on one side of the card. This isn't necessary to making them coupons, but it's an easy way to make them stand out.


And to show my true pack-rat/craftiness, I've been saving those little punched circles and piecing together a garland by gluing two together over a length of string. I couldn't possibly throw away perfectly good little circles! ;)

Next, I cut pieces of cardstock to fit just inside the length and width of the business card. This cardstock comes from the edges of the bigger sheets I use to make my cards and art -- yet another thing I save for just such a occasion. Using my handy-dandy adhesive dispenser, I get the punched card good and sticky.


Then, I center the cardstock over the business cards, and most of the letters and images are covered up!


Then, again because I like to be crafty, I punch the colored hole I've created once with a regular-sized hole punch, and twice with a small punch, so it looks basically like this:


Sort of lunar, don't you think?

Then I print out my text onto return address labels. One sheet gives me thirty stickers. When I created the labels on the computer, I rotated the text on one end to allow me to fold the label over the top edge of the coupon, like so:


A few minutes later, I have thirty cute, unique, and hopefully useful little coupons, and I've turned the lemons of my bum business cards into lemonade... or coupons... with a lemony zing, if you will. ;)


What do you think? Do any of you include coupons? How about other tricks for using misprinted or outdated business cards?

Thanks for taking a look. Happy crafting!

Wednesday, October 7, 2009

Business Card Holder - a simple, little tutorial

As a seller, I know that it's important to place a few business cards with every order from my shop. As a buyer, I love getting fun packages and neat little extras. Marrying these two ideas, I've come up with a simple business card holder that doubles as a sort of goodie bag for my lucky and lovely patrons. And here, for your crafting delight, is a tutorial to make your very own business card holders.


Tools and Materials:

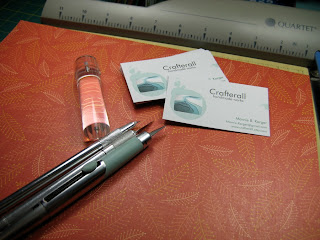
- Cardstock or thin paperboard (I'm using a 12 x 12" scrapbook-type cardstock. Try cereal box paperboard or an oversized postcard)
- Ruler
- Paper Cutter(s) (I'm using my big paper slicer for the straight cuts and a small swivel blade for cutting the notch)
- Scoring tool (I use a scoring blade on a paper trimmer. A bone folder can work as well)
- Some sort of adhesive to hold the holder closed (I use a sticker. Try ribbon, decorative tape, glue dots, double-sided tape, etc.)


Instructions:

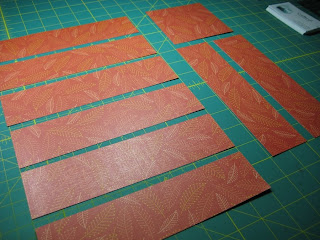
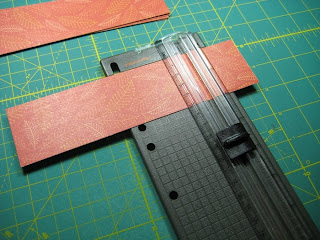
Step 1: Cut the cardsctock into 2" x 8" strips. A 12 x 12" piece yields 8 strips and a 4" square.


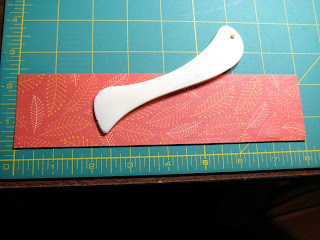
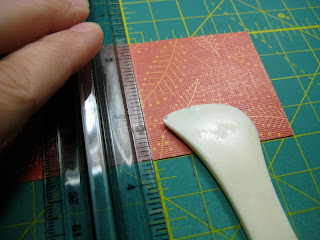
Step 2: Mark scoring points at 2.25" and 6" along a single strip.


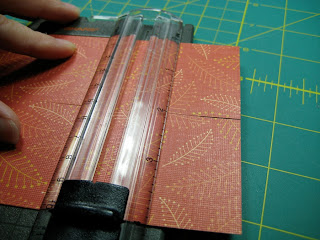
Step 3: Score the cardstock on these two points across the strip.


Again, a bone folder and a ruler work fine here too. If you lack a bone folder, a lead-less mechanical pencil can do in a pinch.


Score any remaining strips you cut along the same points. I usually use the first strip as a guide to cutting the rest by leaving it in the trimmer and laying the next strip beneath it.


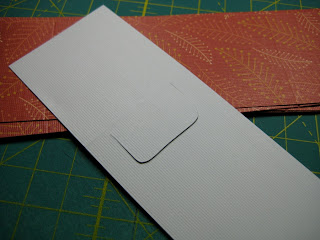
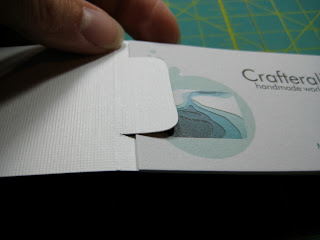
Step 4: Cut the notch. This notch is what holds the business cards more or less in place. Star just below the 2" score line, pull down about half and inch, go over about an inch, and then finish lust below the score line again to look like this:


Then, fit in your cards by slipping 3 or 4 of them under this notch.


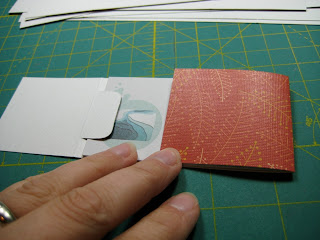
Step 5: Fold sides to close and seal.


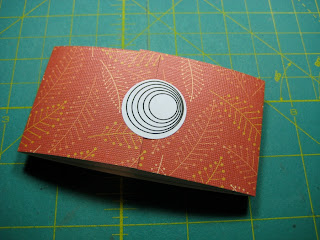
Ta-da!


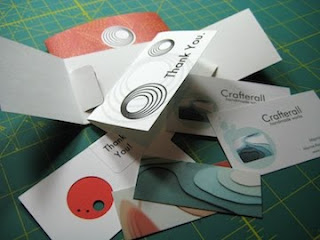
I really put mine to task, filling each one with a folded thank you note, two regular sized business cards, two mini Moo cards, and a coupon made from an old business card (I'll show you how I make those another time).


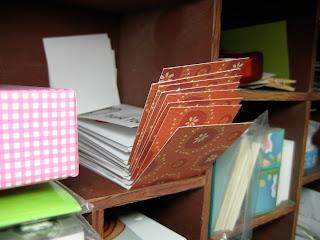
I like to keep a stack of these handy so that when I get an order, all I have to do is write a personal note in the thank-you card, put it all back together, seal it up, and nestle it in the package.


You could certainly dress these up more to your taste, adding ribbon, making them bigger, rounding the corners, etc. Me? I like 'em simple. Do let me know if you try these out. Happy crafting!
 

blogger templates | Make Money Online