As a seller, I know that it's important to place a few business cards with every order from my shop. As a buyer, I love getting fun packages and neat little extras. Marrying these two ideas, I've come up with a simple business card holder that doubles as a sort of goodie bag for my lucky and lovely patrons. And here, for your crafting delight, is a tutorial to make your very own business card holders.

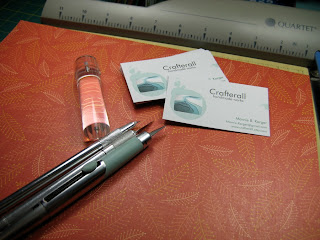
Tools and Materials:
- Cardstock or thin paperboard (I'm using a 12 x 12" scrapbook-type cardstock. Try cereal box paperboard or an oversized postcard)
- Ruler
- Paper Cutter(s) (I'm using my big paper slicer for the straight cuts and a small swivel blade for cutting the notch)
- Scoring tool (I use a scoring blade on a paper trimmer. A bone folder can work as well)
- Some sort of adhesive to hold the holder closed (I use a sticker. Try ribbon, decorative tape, glue dots, double-sided tape, etc.)
Instructions:
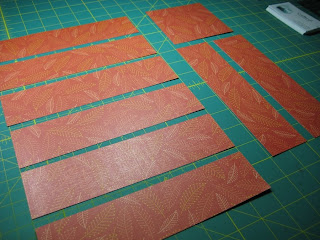
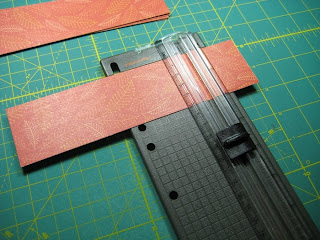
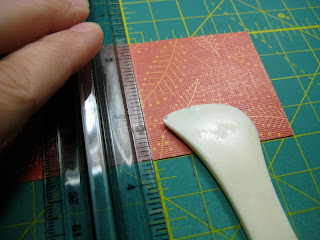
Step 1: Cut the cardsctock into 2" x 8" strips. A 12 x 12" piece yields 8 strips and a 4" square.
Step 2: Mark scoring points at 2.25" and 6" along a single strip.
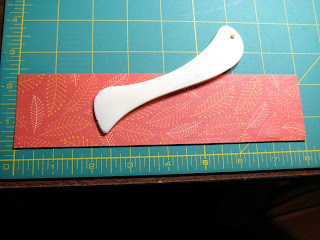
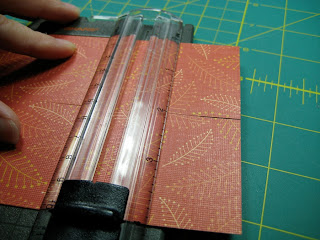
Step 3: Score the cardstock on these two points across the strip.
Again, a bone folder and a ruler work fine here too. If you lack a bone folder, a lead-less mechanical pencil can do in a pinch.
Score any remaining strips you cut along the same points. I usually use the first strip as a guide to cutting the rest by leaving it in the trimmer and laying the next strip beneath it.
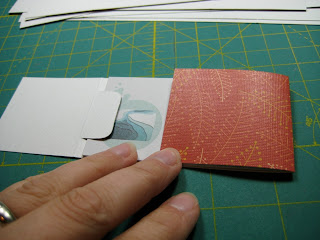
Step 4: Cut the notch. This notch is what holds the business cards more or less in place. Star just below the 2" score line, pull down about half and inch, go over about an inch, and then finish lust below the score line again to look like this:
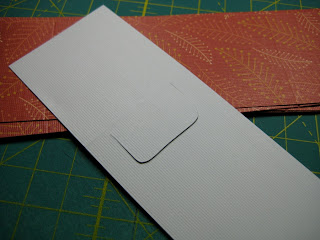
Then, fit in your cards by slipping 3 or 4 of them under this notch.
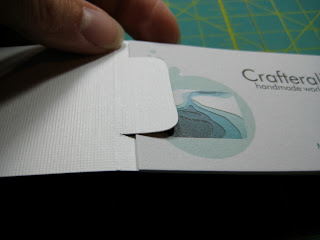
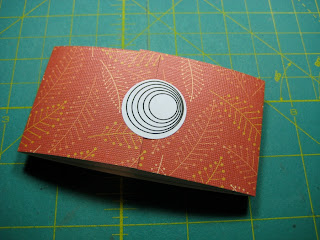
Step 5: Fold sides to close and seal.
Ta-da!
I really put mine to task, filling each one with a folded thank you note, two regular sized business cards, two mini Moo cards, and a coupon made from an old business card (I'll show you how I make
those another time).
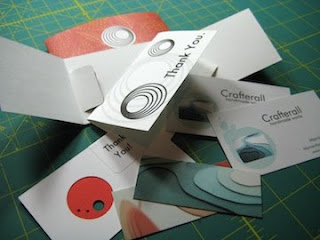
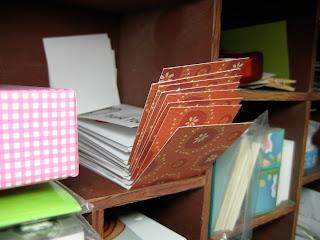
I like to keep a stack of these handy so that when I get an order, all I have to do is write a personal note in the thank-you card, put it all back together, seal it up, and nestle it in the package.
You could certainly dress these up more to your taste, adding ribbon, making them bigger, rounding the corners, etc. Me? I like 'em simple. Do let me know if you try these out. Happy crafting!


